
What are the benefits of using Fire3d for zone plans?
- No more zone plan outsoucing costs - Zone Plan costs can rapidly add up with single zone plans costing £50 - £400+. Save hundreds monthly.
- Fast turnaround (No site revists) - Create Zone Plans as you need them or delegate to engineers on site. Smaller sites often take 10 minutes from start to finish
- Business Logo and details auto-added - We auto-add your business details and logo to every plan for a professional finish.
- No drawing or zone limits - We can handle large sites with multiple floors, multiple drawings, multiple panels and multiple zones.
- Professional CAD standard output - We use vectors (like AutoCAD) to create our zone plans so there's no loss of quality at large A1 & A2 print scales or when zooming in on PDF readers.
- Auto Oriented for BS5839 - We auto-orient your added plans for each Panel & Repeater location to comply with BS5839.
Create Zone Plans in 4 easy steps...
1 Upload your PDF plans
Easily upload your floor plans in PDF or if you don't have plans you can draw them in Fire3D.
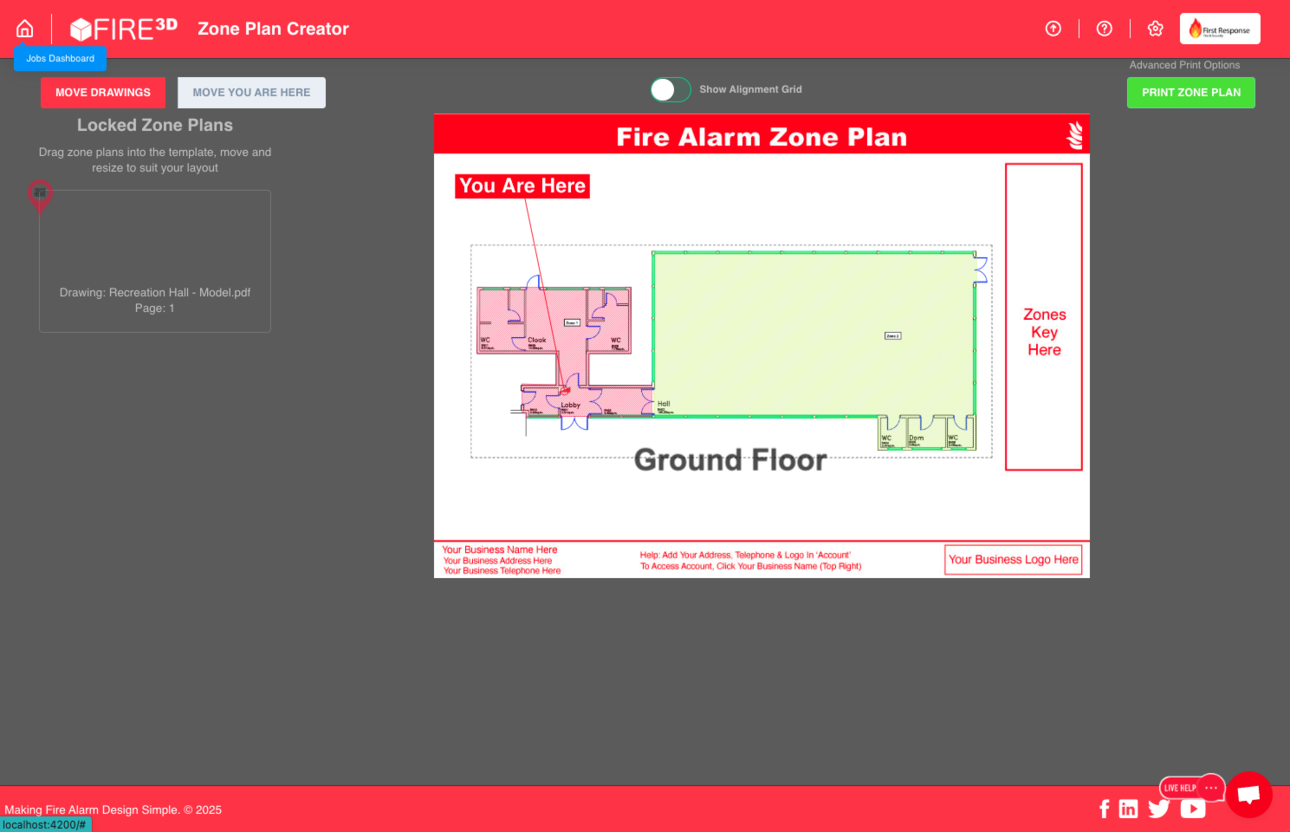
2 Mark Out Zones & Panels
Mark out zones and add panels with a click of the mouse.
3 Position In A Zone Plan Template & Leave The Rest To Us
Drag and position marked up floor plans into our modern or traditional templates. Add labels where needed. We take care of the legend, buisness logo and business details automatically and create the zone plan in the cloud in less than a minute.
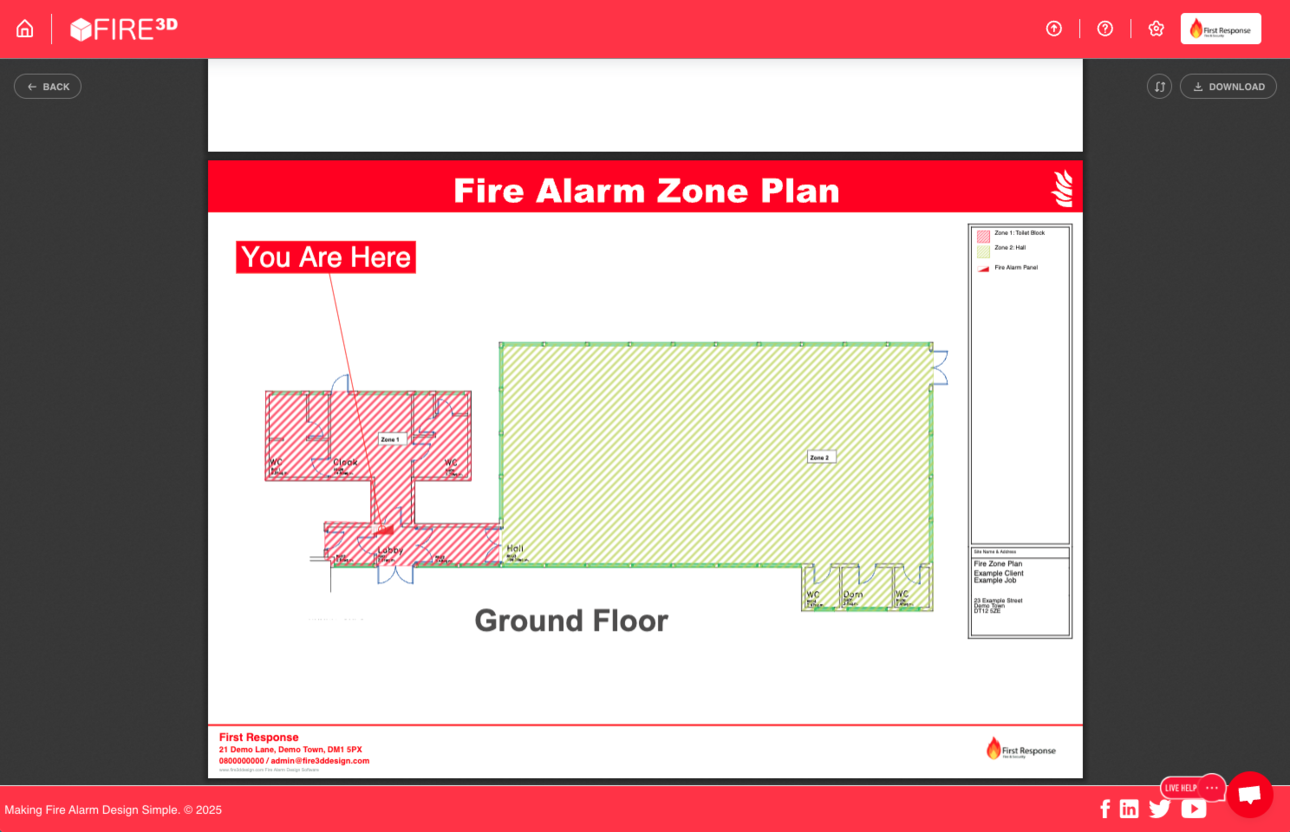
4 View, Download & Print
Download the finished PDF zone plan to your device ready to print.
Get started with the Zone Plan markup tool. It's easy to use, simple & fast.
We hope you find the zone plan tool helpful. Please feel free to ask for help in app using the live in app help chat